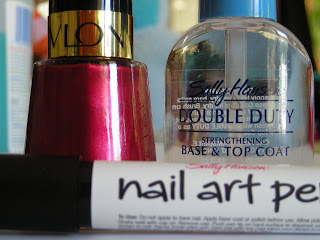
I’m using:
- · Sally Hansen Double Duty Base and Top Coat
- · Revlon 760 Cherry Crush nail polish
- · Sally Hansen Nail art pen 01 White
Before you begin make sure you have plenty of time on your hands to do this (and if you have kids wait until they have gone to bed, as I found out)
Im going to show you 2 methods;
1. Coat your nails with a base coat and let completely dry
2. Using the nail art pen draw on the half moons, do the outline first and then colour in
3. Carefully paint your nails with your colour and let dry
4. Apply top coat.
1. Coat your nails with a base coat and let completely dry
2. Paint colour on as you usually do (full nail, and two coats if required) let dry completely!
3. Draw on half moons as per above
4. Apply top coat
Problems I came across
The traditional way is very tricky and I found myself going over the white again anyways. The nail art pen will cover the colour easily so you can draw it over the top of the colour and not see any of the dark colour coming through. Depending on what top coat you use I found that the white cracks under the top coat, but was fine if applied over the top. Make sure the paint is completely dry before applying the nail art pen or it just smudges.
I really liked the concept of the art pen. It was easy to use, good consistency and was happy with the colour. They came in a wide range of vibrant colours for all types of nail arts. They retail for around AU$12.95 and available from Priceline stores.


No comments:
Post a Comment