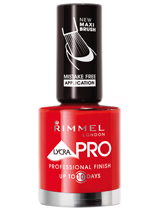
Information, Tips, reviews and products for the Australian Vintage fiends, Retro beauty's & Glamour Girls.
Showing posts with label polish. Show all posts
Thursday, May 20, 2010
RIMMEL London Lycra Pro nail polish
Rimmel have designed a new Maxi brush for a mistake free application. The brush was a little odd to use first off but after a couple of strokes the wider brush wasn't so bad. If you are wanting to use this polish for half moon nails, i'd think again. the wider brush would only suit a full coloured nail. It did how ever do what it said and leave a nice, stroke free finish.
Drying time was also quite good. It only took a few mintues and it was touch dry. This is really important for me with a busy family. The formula is suppose to last 10 days. So far im on Day 2 and there are no chips. I'm pretty hard on my nails and would expect a few chips by now.
I was a little disapointed with the solidness of the colour. For me its a little sheer. I ran over with 3 coats and it gave it a fairly descent cover but I can still see through it. The polish was also fairly matte compaired to its counter parts. So if you are after a more vintage matte finish, this is the polish for you. But a glossy top coat easily added some shine.
Overall I was pretty happy with it.
* Priceline have buy 3 for the price of 2 Rimmel products (see priceline for details)
There was a wide variety of pretty colours in the range. Check out Rimmels website for more colours
Wednesday, March 17, 2010
How To: Half moon nails
I’m using:
- · Sally Hansen Double Duty Base and Top Coat
- · Revlon 760 Cherry Crush nail polish
- · Sally Hansen Nail art pen 01 White
Before you begin make sure you have plenty of time on your hands to do this (and if you have kids wait until they have gone to bed, as I found out)
Im going to show you 2 methods;
1. Coat your nails with a base coat and let completely dry
2. Using the nail art pen draw on the half moons, do the outline first and then colour in
3. Carefully paint your nails with your colour and let dry
4. Apply top coat.
1. Coat your nails with a base coat and let completely dry
2. Paint colour on as you usually do (full nail, and two coats if required) let dry completely!
3. Draw on half moons as per above
4. Apply top coat
Problems I came across
The traditional way is very tricky and I found myself going over the white again anyways. The nail art pen will cover the colour easily so you can draw it over the top of the colour and not see any of the dark colour coming through. Depending on what top coat you use I found that the white cracks under the top coat, but was fine if applied over the top. Make sure the paint is completely dry before applying the nail art pen or it just smudges.
I really liked the concept of the art pen. It was easy to use, good consistency and was happy with the colour. They came in a wide range of vibrant colours for all types of nail arts. They retail for around AU$12.95 and available from Priceline stores.
Subscribe to:
Posts (Atom)